Monday, 7 July 2014

Ice Ice Baby....

OMG, I am the meanest mom in the world!  My 2 year old is currently having a tantrum because I won't let her wear running shoes that are two sizes too small for her.  Let me tell you, NOBODY can throw a tantrum like a 2 year old!  I just spent an embarrassing amount of time learning how to mute my videos so you all didn't have to share in my misery...you're welcome!

Anyway, let's get down to business.  First up, we need a soundtrack.


That's better! Now let's talk buttercream or, if you saw my last post, "butter"cream.  Here is a link to the first buttercream recipe I ever made.  Why do I refer to this as "butter"cream you may ask?  Well, it doesn't contain ANY butter....zero, zip, nada!  You may also hear this referred to as a crusting or American buttercream.  As the name implies, the buttercream gets all nice and crusty as it dries.  This kind of icing is ideal for piping flowers that need to be picked up and transferred onto your cake.

Now you might be wondering why in the world would someone swap Crisco (a.k.a. Trex or vegetable shortening) for butter just to add butter flavoring instead?  Well, there are actually several valid reasons.  First of all, Crisco stands up better to heat.  If your cake is going to be sitting outside in August for more than 10 minutes, this may be the icing for you!  Also, when piping, the heat from your hands won't melt the icing in your bag as quickly as they would if using butter.  Another reason would be the color.  If you're doing a wedding cake and you want the cake to be white, white, white...Crisco is the way to go - just remember to use artificial clear vanilla as well.  Crisco is also dairy free, vegan and all that greasy goodness makes it just slide right down your pie hole (insert shudder here).

So this recipe is for a stiff buttercream.  If you try to ice your cake with this, you'll probably throw in the towel and never attempt cake decorating again.  You will need to thin it out.  Luckily, it's really easy to do.  Just add water very s...l...o...w...l...y.  We're talking a teaspoon at a time.  Mix after each addition and check the consistency.  About 5 teaspoons should do the trick.  A quick test to see if your icing is the right consistency is to stick a spatula in the mixing bowl and wiggle it (just a little bit, ha).  You know you have it right if the spatula falls over.

I'm not going to lie to you...I honestly hate this stuff (sorry Wilton).  In fact, I used to think I hated all buttercream until I stumbled upon a gem of a recipe, but we'll get to that later.  I'm sure there are better recipes out there for crusting buttercreams but I haven't done too much experimenting, being as I'm more of a fondant gal.  If you are really into sweet, sweet, sweet icing you'll probably enjoy this more than I do.

OK, time to start icing! This method will work for any crusting buttercream.  You're going to need some sort of turn table to put your cake on.  They sell turn tables specifically designed for cake decorating but I just use a lazy susan (see that dear, I don't own EVERY kitchen gadget).  You're also going to need a spatula.  This is my all time favorite spatula to ice with.  It's a 9" offset (or angled) spatula.  This is really a personal preference.  Some people prefer a straight spatula but for some reason I always end up covered in icing when I use one (weird I know).  I just really need that extra 1/2" between my fingers and the cake!

So plop your cake down on your turn table (check out my previous blog post here about filling your cake if you're so inclined) and scoop a HUGE dollop of buttercream onto the middle of your cake.  This is not one of those less is more sort of scenarios!


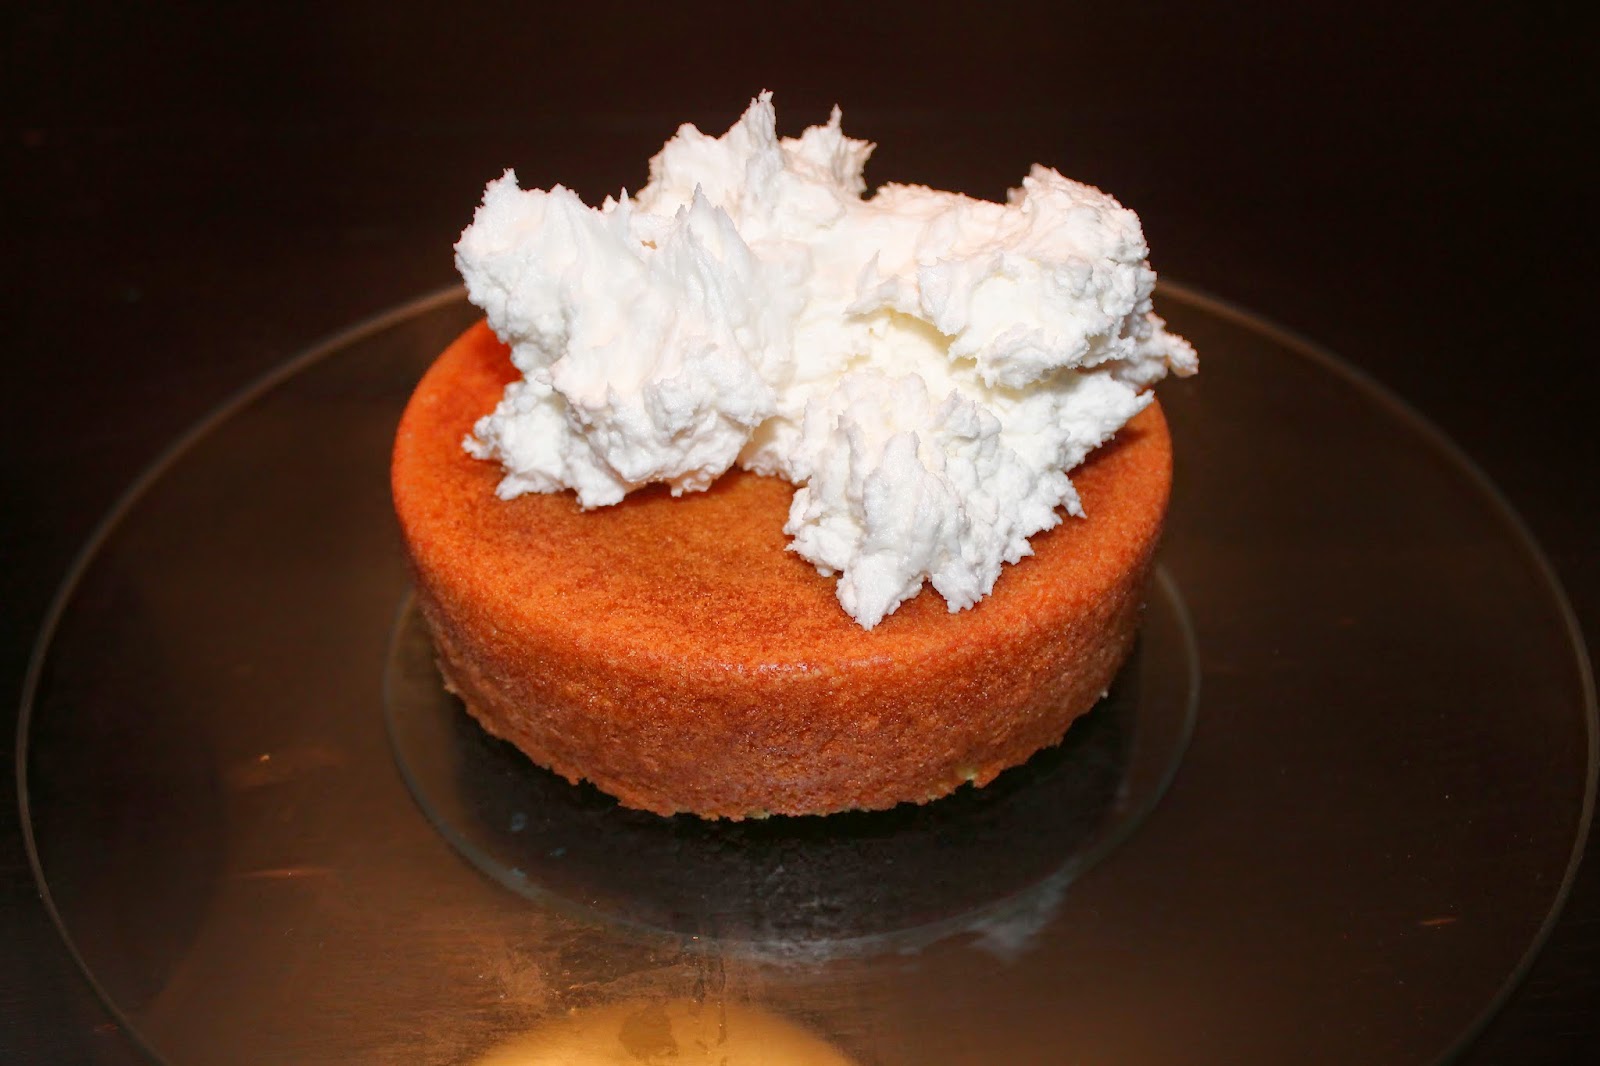
Now it's time to put your prissy pants on and do a move I like to call the "queen wave".  The object of the game here is to keep pressing down on that icing in the middle until it covers the entire top of the cake and is flowing over the sides.


It's all in the wrist! And now you're going to take all that overflowing buttercream and do the same on the sides.


I never claimed that my videos would be exciting. OK, so now you have a cake completely covered in icing.  It probably looks a bit like this.


What a beaut, haha!  Trust me, we'll get there! So now I want you to take your spatula like so:


Hold it up against the side of your cake and start rotating your turntable.  This will take off all that excess buttercream.  Now you should have a cake with fairly smooth sides and a lip of buttercream higher than the top of your cake.  Let's take care of that lip.


Ok, so your sides and top are smooth-ish.  Your cake probably looks something like this:


Aren't you glad you read this tutorial?  Some of you may think I'm crazy right now, but just trust me.  I need you to walk away from your cake.  Go do the dishes, turn on the TV, read a book, whatever you'd like.  Just DO NOT touch that cake. We need to let this guy dry out for about an hour.  After an hour gently touch your icing.  It should feel like it has crusted over and when you pull your finger away the buttercream shouldn't stick to you.  You can't rush this step! If it's not dry, the next step won't work.

Ok, so now you have this crusty, fairly ugly cake.  Great!  Go cut yourself a square of parchment paper about the size of your hand.  Place the square on top of your cake and gently rub the icing smooth with your other hand.


The idea here is to let the heat of your hand warm up the icing enough to smooth it out nicely.  If you notice that your parchment paper is sticking to your cake, stop what you're doing and let the cake crust again and start over.  You're going to do this to the entire cake.  You may notice after smoothing things out the first time that you've smooshed all your icing out to the sides, like this:


Just take your spatula and scrap off the excess, let it crust again and smooth once more.  And here's the finished product:


I just used a damp paper towel to clean up the turn table. If you're a perfectionist, this whole process may drive you crazy.  I usually get to a point where I think it's smooth enough and move on.  Remember that you're going to be putting borders and embellishments all over this baby!  And naturally these embellishments will be strategically placed to cover up any imperfections.

So there you have it!  Next up, I'm going to show you my second cake (please try to contain your excitement)!

#cake #cakedecorating #caketutorials


Thursday, 3 July 2014

Dam Girl....

The most important thing I learned from my first cake was this: I really enjoyed doing it!  At the time, my oldest daughter was 6 months old and I was already dreaming of all the wonderful (crazy) things I was going to do for her first birthday party.  This is where the second thing I learned came into play: I had NO idea what I was doing!  I iced my first cake with a butter knife and a fork for goodness sake!  I needed some direction!  So, I headed down to my local Bulk Barn and signed up for the Wilton Course 1: Decorating Basics.

For someone who is already addicted to buying kitchen gadgets (just ask my husband), going to a Wilton Course is a dream come true!  Do you have any idea how many cake decorating tools there are??  I was in heaven! There was a tool for everything! Tips and rollers, mats and couplers!  Even a handy dandy stand to hold your piping bags in while you're working (by the way, I have NEVER used this stand - just save your money).  Just writing that gave me an idea for a new blog post - I should do a post about the best tools I've bought, there are definitely some I couldn't live without!

I seem to have gotten off topic here.  I'm supposed to be talking about the wonderful world of Wilton.  The first course covers all the basics.  They give you tips on baking your cakes, a recipe for "butter"cream (more on that next post) and the basics of icing a cake.  Honestly I was a little disappointed with the curriculum...yawn!  Bring on the 5 tiered masterpieces! Despite my apprehension, on the first day, I learned 2 tips that made the whole experience worth every penny.

The first tip involved the actual baking process.  You need to have a great foundation in order to decorate amazing cakes.  These two products will save you many headaches:


Those grey things that look like bandages are the Wilton Bake-Even Strips (these are old ones, I believe the new ones are purple) and they are AMAZING!  You just soak them in water (important step here people, please don't burn down your house) and then pin them around your baking pan and your cakes bake evenly (no hump in the middle).  I find that I get the best results if I remove the strips after about 20 minutes.  If I leave them on for the whole baking time my cakes tend to not pull away from the sides of the pan and I don't get the nice crust, which is essential for easy icing.

I also like to prep my pans with the Wilton Cake Release.  You just shake up the bottle, squirt it in the pan and brush it around the bottom and up the side of the pan.  I prefer to use a silicon brush to do this, I've used my pastry brush but I find the bristles sometimes fall out (or maybe I have a really crappy pastry brush....). The first time I used the cake release I made the disastrous mistake of not shaking the bottle.  It looked like oil when I squirted it into the pan and my cake DID NOT release. It was a giant mess!  It should look like cake batter when it comes out, if it doesn't look like batter, keep shaking!

The second tip is called "building a dam".  The best thing about cakes, in my opinion, is the filling.  It needs to be delicious, there needs to be lots of it and it needs to stay INSIDE the cake instead of leaking out everywhere.  And here's how you do it:


You will need a leveled off cake (there's a tool for that, or if you're really brave, a serrated knife will do the trick), a piping bag and a piping tip.  I'm using a huge 1M tip (because I want LOADS of filling) and this will build a really high dam.  In the course they recommend tip 12, I honestly don't think it matters, I often use the first tip I happen to grab.


Fit your tip into your bag and fill 'er up!  Now just pipe a border around your cake.  The stiffer your buttercream, the sturdier the dam.


Around and around you go.  It doesn't need to be pretty!  P.S. I was making a Canada Day cake here (tutorial to come), hence the red and white cake.


Now it's time for the yummy filling.  This is a strawberry rhubarb filling.  Nom nom nom...


Put the hat on and you're done!  Such a simple fix for leaky filling.  Alternatively, you can roll out a piece of fondant into a long rope and snake it around your cake.  You'll also notice in this picture that the bottom of my cake is now the top.  I like to check out my cakes (insert catcall here) and see which one looks the smoothest and reserve it for the top of my cake.  This just makes it easier to ice, and you won't pick up as many crumbs as you go.

Next up, Ice Ice Baby.....

#cake #caketutorial #cakedecorating

Tuesday, 1 July 2014

How it all got started....

So let me just start off by saying this....I am not a baker....or a photographer...or a blogger, just a girl with a stand mixer. With that being said, I am on a cake decorating journey and I have decided to share my adventures.  And what better place to start than all the way back to the beginning...

I'm not going to lie, sometimes I come up with some crazy ideas.  They always start off small and fairly harmless but they somehow morph into craziness.  So 2 years ago, a dear friend of mine adopted a little boy just about to turn 3 years old.  I decided that since she didn't get to have a traditional baby shower, I'd throw her an adoption party.  And what's the best kind of party to throw a 3 year old boy?  Why, a pirate party of course!!!  Easy Peasy - treasure hunt, pinata, photo booth, a cake and 100 of our closest friends!!  Haha, I can't actually remember how many people came but it felt like one hundred.  Luckily my mother in law lives out in the country and has converted her huge barn into a party barn!  I feel like every family needs a party barn!  (Side note: my 2 year old just got ahold of a piping bag and is currently squeezing buttercream straight into her mouth - does that count as dinner?)

My sister-in-law (Katie) is my party planning partner.  I'm not sure which of us came up with the idea to make our own cake, but the idea was born.  And we weren't just going to make any cake, we were going to make a FOUR layered treasure chest cake!


We had no idea what we were doing, and in hindsight, it's a miracle it stayed together.  We baked 4 slab cakes, stacked 3 of them (without any supports) and placed foil wrapped gold coins and candy necklaces on top. Then we gently placed the 4th slab cake on top.  We iced it with frosting in a can (remember the part about this being the beginning) and dragged a fork through it to create the textured look. The yellow studs were candy we bought at the bulk store and the keyhole was carved out of a piece of fruit leather.  We put brown sugar down for "sand" and the guest of honor shoved a coin into the top of the chest before we snapped any other shots.  It's like the saying goes - it's my party and I can shove a coin in my cake if I want too....

Anyways, there it is in all it's glory! My first cake!

#cake #firstcake #cakedecorating #caketutorial